BARROSA/CHICLANA (MARCH 5,1811)
INTRODUCTION
Cádiz had been invested
by the French in
January 1810 by a 25,000-strong
French army commanded by Victor, but in March of 1811 a reduction in
the besieging army gave its Anglo-Spanish garrison an opportunity to
lift the siege. Their plan was to ship
an expeditionary force 100 km south
along the coast from Cádiz so as to launch an attack against Victor
from inland.
The force comprised 4,000 British under
Graham, 8,000 men of two Spanish divisions led by
Lardizabal and the
Prince of Anglona, four squadrons of cavalry under Col.
Samuel Ford Whittingham - an English officer
serving with the Spanish army - 1,000 infantry from Gibraltar and
1,600 Spaniards from an irregular force led by
Begines. The overall command was given to
Lapeña, the senior officer at Cádiz.
After several chaotic night marches, Lapeña diverted from his
original intention and decided
to march by the coast road towards Cádiz.
Victor prepared a trap in the plain between
the town of
Chiclana and Barrosa Hill (known then as
Loma de la Cabeza del Puerco and now as the Loma de Sancti-Petri).
Using one division under
Villatte to block the road into Cádiz,
Victor kept two divisions under
Leval and Ruffin
out-of-sight in readiness to make a surprise flank attack that fell
on the single Anglo-Portuguese rearguard division under the command
of
Sir Thomas Graham.
Following a fierce battle, the British
succeeded in routing the attacking French forces.
Although some Spanish units also participated in the fight,
Lapeña does not supported his ally and thus prevented a
smashing French defeat. The French were able to regroup and reoccupy
their siege lines so the Graham's tactical victory proved to have
little strategic effect and the siege
remained until finally being lifted on 24 August 1812.
Bibliography
- Lipscombe Nick (2010), 'The Peninsular War Atlas', Osprey
- Fortescue, J.W (1917), 'A History of the British Army', Volume 8
- López Fernández, J.A., 'Chiclana 1811. La defensa de Cádiz'
Guerreros y Batallas nº 65, Almena Editorial
- Martínez Valverde, C. (1961), 'El
movimiento envolvente contra la línea francesa frente a Cádiz en
1811 y la batalla de Chiclana', Revista de Historia Militar nº
8, pp 65-112
- Napier, W.F.P. (1833) 'History
of the war in the Peninsula and in the south of France, from the
year 1807 to the year 1814', Volume 3
- Oman, Charles (1911), 'A History of the Peninsular War: Volume
IV', Greenhill Books 2004
- Queipo de Llano y Ruiz de Saravia, José María, Conde de Toreno
(1835), 'Historia
del levantamiento, guerra y revolucion de España', Volumen 4
- Sañudo, J.J. 'Base de Datos sobre las Unidades Militares en la
Guerra de la Independencia', Ministerio de defensa, Madrid, 2007
TABLE-TOP ADAPTATION
GO TO
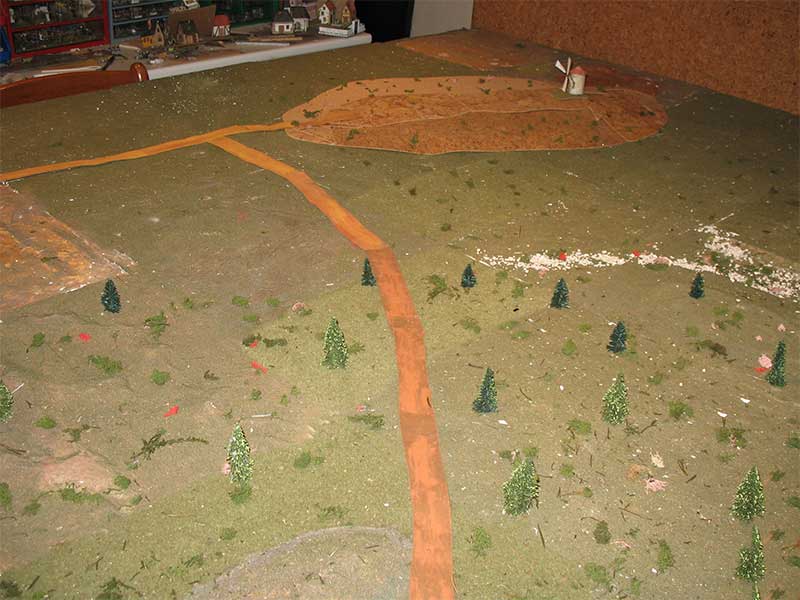
THE BATTLE IN PICTURES


Fortescue's map
Arteche's map
Game map

The actual battlefield

French deployment


British/Spanish deployment

Scenario pdf file for Barrosa/Chiclana
GO TO
THE BATTLE IN PICTURES
Summary of the oob
French Forces (Army Moral 28; Break
point 9)
Marshall Victor
Infantry Ruffin (5 battalions, 1 foot battery) ; Leval (6
battalions, 1 foot battery)
Cavalry: Dermoncourt (1 regiment, 1 battalion)
British/Spanish
Forces:
(Army Moral 34; Break point 11 )
GdD
Infantry: Dilkes (3 battalions) ; Wheatley (4 battalions) ;
Cruz Murgeon (2 battalions)
Cavalry: Whittingham (2 regiments)
Artillery: 2 foot batteries
Reinforcements
Begines (4 battalions)
Notes
Notes All French units are on the table. The duration of the game
is 16 Turns. British are the first side. There are not geographical
objectives.
OPTIONAL RULES
The wavering Lapeña (Scenario rule)
According to Oman, Lapeña did not support the British during the battle
and only the Cruz Murgeon’s brigade, entrusted to Graham, fought along
his allies. However, according other accounts (Fortescue, Arteche) the
Begines’s brigade did participate in the fight against the
Dermoncourt’s outflanking force, so that brigade is included as
Reinforcements.
To simulate the Lapeña’s wavering efforts, the
Reinforcement arrival test (p. 91) is carried out with
an additional -1 modifier. The
Reinforcements will arrive deployed at the C3 end
road.
The irregular flankers (Scenario rule)
In the actual battle, part of the Barnard's flankers (4 coys. of 3/95th
Rifles) and 2 coys. from the 20th Portuguese fought in
skirmish order to cover the
deployment of the Wheatley’s brigade. Meanwhile, the remaining Barnard
elements (2 coys. of the 47th Foot) acted as supporters for the British
artillery. To simulate this behaviour:
(a) All the light elements of the Wheatley brigade (Barnard's Flankers
and the 2 coys. of the 20th Portuguese) have been
amalgamated into a single large unit, made Irregular as per
the 'Creating Irregular Units'
Optional Rule (p 74), and whose statistics are
V/I/SK3 (+)
(b) This unit will use the 'Half Battalion
Deployed' Optional Rule (p 74) slightly modified: the
unit may break off four (instead
two) bases as SK bases, to enhance skirmishers for other friendly
regular infantry, while retaining two
(instead four) bases to function as a small unit.
(c) The four skirmish bases will be used as Irregulars fighting in line
when necessary. However, a gap of until 1/2 BW
will be allowed between adjacent bases to increase the front
of the unit.
(d) The SK power of the Wheatley's brigade will be not marked with SK
bases.
The real British OOB (Very Optional and non tested)
During the confusion of the British countermarch towards the Barrosa
Hill, some British units ended in the wrong brigade. To simulate that
and also to research the use of units smaller than 4 bases in Lasalle,
change the British infantry OOB to:
1st Brigade Dilkes (-1/¶)
2/1st Guards V/E/SK2/Gd
2/3rd Guards V/E/SK1/Gd (2 bases)
1/2 2/67th R/E/SK1 (2 bases)
2/95th (2co) 2 SK bases
2nd Brigade Wheatley (+1/*)
1/28th R/E/SK2
2/Coldstream Guards V/E/SK1/Gd (2 bases)
1/2 2/67th R/E/SK1 (2 bases)
2/87th R/E/SK2
Barnard Flankers V/E/SK3 (V/I/SK3) +
See a story version at the
Project Leipzig (1813)
blog
THE BATTLE IN PICTURES